Beginner bench press weight: your guide to a safe and strong start
What's a good beginner bench press weight? Learn how to find your ideal starting point, master the setup, and follow a proven plan for safe, effective progress. So, what’s a good starting weight for the bench press? A common rule of thumb is for men to start with 50% of their body weight and for women to start with the empty 45-pound barbell. But let's be clear: these are just starting points. The real goal is finding a weight that challenges you while letting you maintain perfect form.


Bench Press averages for beginners
Walk into any gym, and the first question that pops into most beginners' heads when they see a bench is, "How much should I be lifting?" It's a natural question, but the answer isn't about ego—it’s about starting safely to build a strong foundation for years to come.
Your ideal starting weight depends on your body weight, age, and especially your training history. If you've been doing push-ups or dumbbell presses, you'll naturally start with more on the bar than someone walking into a weight room for the very first time.
What is a realistic starting weight?
To get a better idea of what's "normal," we can look at massive data sets from fitness platforms. An analysis of over 48 million logged lifts shows the average beginner male has a one-rep max (1RM) of around 103 pounds (47 kg). For women just starting out, the average 1RM is closer to 55 pounds (25 kg).
These numbers give you a ballpark figure, but they are by no means a target you need to hit on day one. You can dig deeper into these figures in this complete breakdown of bench press strength standards.
Key Takeaway: Your goal isn't to match an average. It's to master the movement. Nail down your form, control the weight, and be consistent. The strength will come.
To give you a quick reference for your first few workouts, here are some practical starting points for your working sets (the main sets after your warm-up).
Average Beginner Bench Press Starting Weights
| Lifter Profile | Estimated Starting Weight (Barbell) | Focus |
|---|---|---|
| Untrained Male | 65–95 lbs | Mastering form, feeling the chest work |
| Untrained Female | 45 lbs (the empty bar) | Learning bar path, building confidence |
| Active Male (Sports/Manual Labor) | 95–135 lbs | Controlling a heavier load, finding a groove |
| Active Female (Sports/CrossFit) | 65–75 lbs | Transferring existing strength to the bench |
Remember, these are just educated guesses. The right weight is the one you can lift for your target reps with good form. Always start lighter if you're unsure.
This chart gives you a good visual of where most beginners land.

As you can see, the journey starts with modest, manageable weights. This is all about ensuring safety and drilling in the proper technique from the very beginning.
Setting Your Expectations
"Beginner" is a broad term. It could mean you've never seen a barbell before, or it could mean you've been lifting on and off for a year without a real plan. Because of that, averages are guides, not gospel.
Keep these points in mind as you get started:
- Body Weight Is a Factor: A 220-pound person will almost always have a different starting point than someone who weighs 140 pounds. Use body weight percentages as a rough guide, not a strict rule.
- Form Before Load: This is non-negotiable. Loading up the bar with weight you can't control is the fastest way to get hurt and kill your progress. The perfect beginner weight is one you can lift for 8-12 reps with flawless technique.
- Progress Is the Real Win: Where you start matters far less than where you're going. Small, consistent jumps in weight or reps each week are the secret to long-term success.
Finding your personal starting weight
Forget the charts and averages for a minute. Your starting weight is personal. The goal is to find a load that’s challenging enough to force your muscles to adapt, but light enough that you can maintain perfect form from the first rep to the last.
Let's walk through two simple, safe ways to figure out exactly what that number is for you.
The empty bar method
This is the most reliable starting point for any true beginner. It's exactly what it sounds like: you start with an empty 45-pound (20 kg) Olympic barbell.
Don't let your ego tell you this is "too light." The empty bar is your best tool for mastering the movement pattern itself. It lets you build confidence and groove the correct technique without the pressure of a heavy, intimidating load.
If you can handle the empty bar for 8-12 reps with clean form, you're ready to add a little weight. Start small—2.5 or 5 pounds to each side. The goal is to find a weight where the last couple of reps feel like real work, but your form doesn't fall apart.
Pro Tip: Rushing to add weight is the fastest way to get stuck or injured. Spend your first few workouts mastering the movement with a light load. Nailing your technique now will pay off with much faster and safer strength gains down the road.
Using an estimated 1-rep max
Another great way to dial in your starting weight is by using an estimated one-rep max (1RM). Your 1RM is the absolute most you can lift for a single rep. As a beginner, however, testing a true 1RM is dangerous and completely unnecessary.
Instead, we'll work backward. You’ll find a weight you can lift for about 5-8 reps with good form, and then plug that into a calculator to estimate your max. For your actual workouts, you’ll start with a percentage of that number—usually 60-70% of your estimated 1RM.
This approach makes sure the weight is heavy enough to trigger muscle growth but light enough to perform several clean sets.
Here’s an example of what you’ll see in a 1RM calculator.
In this case, lifting 100 pounds for 8 reps gives an estimated 1RM of 125 pounds. A smart starting weight would be 60% of that, which comes out to 75 pounds. If you're looking for a more advanced, data-driven approach to fine-tuning your lifting, check out the principles of Velocity Based Training (VBT).
Whichever method you pick, these two rules are non-negotiable:
- Always Warm Up Properly: Never walk up to a bench and load up your working weight. Get your blood flowing with a general warm-up, then do a few progressively heavier sets of the bench press to prep your muscles and nervous system.
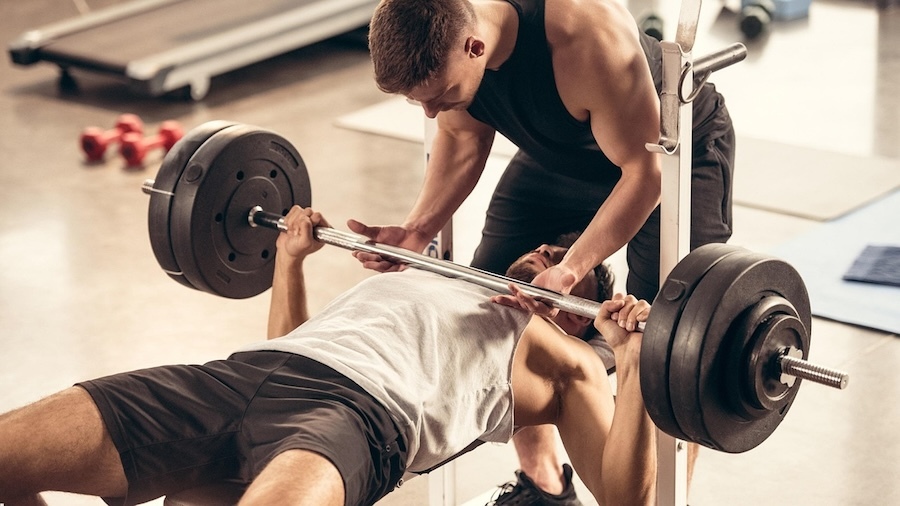
- Use a Spotter or Safety Pins: Safety is everything. A spotter is there to help you if a rep goes wrong. If you’re training alone, make sure you’ve set the safety pins on the power rack to the correct height. There's no excuse for skipping this.
Your step-by-step Bench Press setup
A strong bench press is built from the ground up, long before you even unrack the weight. A sloppy setup is like trying to shoot a cannon from a canoe—all that potential power just dissipates. The goal is to create a solid, stable platform that turns your entire body into a launchpad for the bar.
Think of your setup as a pre-lift ritual. Every time you get on that bench, you should run through the exact same sequence. This locks your body into its strongest position, builds consistency, and keeps you safe as the weights get heavier.
Establish your five points of contact
Your connection to the bench and the floor is everything. You need to maintain five non-negotiable points of contact throughout the entire lift. If you lose even one, you're leaking power and compromising stability.
These points create a chain that lets you transfer force directly from the floor, through your body, and into the barbell.
- Your Head: The back of your head stays planted on the bench. Lifting it is a common mistake that strains your neck and throws your entire upper body out of position.
- Your Upper Back: This is your main base of support. Actively drive your shoulder blades and upper back into the bench pad.
- Your Glutes: Your butt must stay glued to the bench. Lifting your hips off the pad turns the lift into a dangerous decline press and is an immediate "no rep" in competition.
- Your Left Foot: Plant your left foot flat and firm on the ground.
- Your Right Foot: Do the same with your right. Your feet should be wide enough to give you a rock-solid, stable base.
Creating a stable arch and shoulder position
Once your contact points are set, it’s time to generate tension. This starts with your shoulders. Before you even think about unracking the bar, you need to "pack" your shoulders by pulling your shoulder blades together and down, like you're trying to shove them into your back pockets.
This simple move creates a slight, powerful arch in your upper back. This isn't just for show; it's critical for two big reasons:
- Shoulder Safety: It puts your shoulder joint in a much safer and more stable position, dramatically reducing the risk of impingement.
- More Power: It slightly shortens the bar's path and puts your chest muscles in a stronger position to fire.
Remember, the arch comes from your upper back, not by jacking up your lower back. Your glutes must stay down. This setup protects your shoulders and lets you press more weight, safely.
Finding your grip and bar path
Grip width has a huge impact on which muscles do the most work. For most beginners, a grip that's just slightly wider than your shoulders is the perfect starting point. When the bar touches your chest, your forearms should be pretty much vertical.
A wider grip will hit more of your chest, while a narrower grip brings in more triceps.
After you unrack the bar, position it directly over your shoulders. As you lower the weight, don't aim for your collarbones—bring it down to your mid-to-lower chest. The bar doesn't travel in a perfectly straight line. It moves in a slight arc, starting over your shoulders, touching lower on your chest, and pressing back up and slightly back toward the start.
Mastering this setup ritual is one of the most important things you can do to find your true beginner bench press weight. It ensures every single rep is built on a solid foundation, making your lifts safer and much more effective.
Your first 12 weeks of Bench Press progress
Alright, you've found your starting weight and dialed in your setup. This is where the real work—and the real progress—begins. For the next three months, your goal is simple: get consistently stronger. Forget random workouts. What you need is a structured plan.
The most reliable way for a beginner to build strength is through linear progression. It's a straightforward approach: you add a small, manageable amount of weight to the bar every single session. Your body is primed to adapt quickly at this stage, and this strategy is the perfect way to capitalize on those "newbie gains."
Plan on benching two or three times a week, always on non-consecutive days. This gives your muscles the time they need to recover and come back stronger. A classic 3 sets of 5 reps (3x5) scheme is perfect for building that initial foundation of raw strength.
The art of progressive overload
The secret to getting stronger isn't a secret at all. It's a principle called progressive overload, which just means you have to consistently challenge your muscles more than they're used to. For the bench press, the simplest way to do this is by adding a little more weight.
Your mission is to add the smallest weight increment you can each workout. Most gyms have 2.5-pound plates, which means you’ll be adding a total of 5 pounds to the bar. If you’re lucky enough to have 1.25-pound plates, a 2.5-pound jump is even better.
Don't let the small numbers fool you. An extra 5 pounds a week adds up to 60 pounds on your bench in just three months. That's the kind of progress that transforms a beginner into a confident lifter.
Of course, this only works if your form stays solid. If you can't hit all your reps with good technique, don't add weight. Just repeat the same weight in your next session. Pride is the enemy of progress.
The importance of a deload week
You can't push the accelerator forever. Around week 4 or 5, and then again around week 9, you might feel a bit beaten down or notice your progress stalling. That’s your cue to take a deload week.
A deload is a planned week of recovery. You’ll lighten the load to give your body, joints, and nervous system a much-needed break. It's the key to breaking through plateaus and preventing nagging injuries down the road.
During a deload week, you can:
- Reduce the weight on the bar by 40-50%.
- Keep your sets and reps the same (3x5).
- Focus entirely on perfect, snappy technique.
This strategic rest is what allows you to keep getting stronger for months, not just for a few weeks. A Personalized strength training app can even help automate this by tracking your performance and flagging when a deload might be a good idea.
To see how this all comes together, let's look at a sample progression.
Sample 12-week beginner Bench Press progression
Here’s what a 12-week linear progression might look like for someone starting with a working weight of 95 pounds and benching twice a week.
| Week | Workout A (e.g., Monday) | Workout B (e.g., Friday) | Notes |
|---|---|---|---|
| 1 | 3x5 at 95 lbs | 3x5 at 100 lbs | Start with your working weight and add 5 lbs. |
| 2 | 3x5 at 105 lbs | 3x5 at 110 lbs | Continue adding 5 lbs each session. |
| 3 | 3x5 at 115 lbs | 3x5 at 120 lbs | Form should still feel crisp and controlled. |
| 4 | 3x5 at 125 lbs | 3x5 at 130 lbs | Getting challenging now. Push through. |
| 5 | Deload Week | Deload Week | Perform your workouts at 50-60% (e.g., 3x5 at 75 lbs). Focus on recovery. |
| 6 | 3x5 at 135 lbs | 3x5 at 140 lbs | Resume progression, starting from your last successful weight plus one jump. |
| 7 | 3x5 at 145 lbs | 3x5 at 150 lbs | Feeling refreshed and strong after the deload. |
| 8 | 3x5 at 155 lbs | 3x5 at 160 lbs | Keep pushing, but listen to your body. |
| 9 | Deload Week | Deload Week | Second deload. Reduce weight to ~90-95 lbs and focus on technique. |
| 10 | 3x5 at 165 lbs | 3x5 at 170 lbs | Back to it. The weight is feeling heavy, but manageable. |
| 11 | 3x5 at 175 lbs | 3x5 at 180 lbs | Almost at the finish line for this block. |
| 12 | 3x5 at 185 lbs | 3x5 at 190 lbs | Congrats! You've nearly doubled your starting bench. Time to celebrate and plan the next phase. |
This is just a template, of course. The key is listening to your body, prioritizing good form, and staying consistent. Stick with the plan, and the results will speak for themselves.
Common beginner mistakes and how to fix them
Every new lifter makes mistakes on the bench press. It’s practically a rite of passage. The lifters who get strong, however, are the ones who learn to spot these errors and fix them before they become ingrained habits.
Ignoring bad form doesn’t just stall your progress—it’s a fast track to a nagging shoulder, elbow, or wrist injury. Let's walk through the most common breakdowns I see on the gym floor and give you the exact cues to fix them.
The chicken wing elbows
This is easily the most common mistake. The "chicken wing" is what happens when your elbows flare out wide to the sides, almost in a straight line with your shoulders, as you press the bar. You'll look like you're trying to flap your wings.
Flaring your elbows like this puts your shoulder joints in a weak and compromised position, seriously increasing your risk of impingement or rotator cuff issues. It also shifts tension away from your chest and dumps it right onto your front delts.
The fix:
- Tuck Your Elbows: As you lower the bar, think about tucking your elbows to a 45- to 60-degree angle from your torso. They shouldn't be jammed into your sides, but they definitely shouldn't be at a 90-degree flare.
- Use the "Bend the Bar" Cue: As you set up, grip the bar and imagine you're actively trying to bend it into a "U" shape. This simple cue forces your lats to engage and naturally pulls your elbows into a safer, stronger position.
Bouncing the Bar Off Your Chest
When the weight starts to feel heavy, the temptation to let the bar crash down and bounce off your chest is real. This is pure ego lifting, and it does absolutely nothing to make you stronger.
Using your ribcage as a trampoline completely negates the most important part of the lift: controlling the negative. It's not just dangerous; it cheats you out of the very stimulus your muscles need to actually grow.
A controlled pause on the chest is the sign of a strong, disciplined lifter. If you have to bounce the weight to get it up, it's too heavy. Drop the weight and focus on owning every inch of the movement.
Hips lifting off the bench
As you grind through a tough rep, you might feel your butt lift completely off the bench. This is a dead giveaway that you're trying to use your lower back and a sloppy form of leg drive to heave the weight up.
This effectively turns the bench press into a weird, high-risk decline press and is an immediate red flag for poor technique.
The fix:
- Stay Glued to the Bench: Before you even unrack the weight, consciously squeeze your glutes. Think about driving them down and into the bench pad for the entire lift.
- Drive Through Your Heels: Leg drive should stabilize you, not lift you. Instead of pushing your hips up, focus on driving your feet hard into the floor, as if you're trying to slide the floor away from you. This creates total-body tightness without your butt leaving the bench.
Beyond these specific errors, your general posture plays a huge role in your lifting performance. Understanding the common bad posture effects can help you correct underlying weaknesses that show up in your lifts and impact your long-term health.
Your Bench Press questions answered

Even with the best program, a few questions always pop up. We get these all the time from lifters who are just finding their groove on the bench, so let's clear them up right now.
Should I start with dumbbells instead of a barbell?
This is a great question, and the answer isn’t black and white. Dumbbells are fantastic, especially when you're brand new. They force each side of your body to pull its own weight, which is great for building stabilizer muscles and preventing one arm from doing all the work.
But for building raw, top-end strength, nothing beats the barbell. It lets you load the weight on heavy, which is the fastest way to drive progressive overload. The best programs usually include both. My advice? Use the barbell as your main strength-building lift, and treat dumbbell presses as a key accessory move to build stability and iron out any imbalances.
How important is a spotter really?
In a word: critical. A good spotter isn't just a safety net; they're a performance tool. They give you two things you can't get on your own.
First is safety. If you fail a rep—and eventually, you will—they're the ones who get the bar off your chest. Getting pinned is no joke. Second is confidence. Just knowing someone has your back gives you the mental green light to push for that tough final rep you might otherwise bail on.
If you train alone, the safety arms on a power rack are your non-negotiable spotter. Set them an inch or two below where the bar touches your chest. Don't ever bench heavy without them.
How do I know when to add more weight?
The golden rule is this: when you can complete all your reps and sets with clean, solid form.
Let's say your program calls for 3 sets of 8 reps. If you hit all 24 reps and the last one looked just as good as the first, it's time to go up. A little grind on the final rep is fine, but it should still be a clean lift.
If your hips are coming off the bench or you have to bounce the bar to finish a set, you're not ready. Own the weight you're lifting now, then earn the right to add more.
Ready to stop guessing and start building real strength? The GrabGains fitness app uses smart AI to create a training plan that adapts as you get stronger, telling you exactly how much to lift and when to progress.
Get inspired and motivated


