Strengthen your weak squat: fix it fast and boost your lift
Discover why your weak squat is holding you back and learn practical fixes to strengthen hips, glutes, and core for bigger lifts.


So, you're asking, "Why is my squat so weak?" Good. Asking that question is the first real step to building a stronger one. The answer almost always comes down to a few usual suspects: poor mobility in your ankles and hips, a weak core or glutes that just won't "turn on," or technique that's gone a little off the rails. It’s almost never about not trying hard enough. It's about a weak link somewhere in the chain.
Why your squat feels weak and how to start fixing it
Feeling stuck with a weak squat is incredibly frustrating. You see other people in the gym moving big weights, and it just looks... easy. But here's the good news: this is a completely fixable problem. The trick is to stop seeing it as one big issue and start thinking of it as a symptom pointing to something deeper.
Your body is a system. For a complex, full-body lift like the squat, every part has a job to do. If one area isn't pulling its weight, others are forced to overcompensate. That's where you get that shaky, inefficient, and weak feeling. Think of it like a construction crew—if the foundation is off, it doesn't matter how strong the walls are. The whole building is at risk.
What's really holding you back?
Your squat strength depends on a few key factors working together. When your squat feels weak, it’s usually because one of these areas is falling short. Pinpointing which one is your first mission.
- Mobility: Can your joints actually get into the right positions? Tight ankles and hips are the most common roadblocks. They physically block you from hitting depth, forcing your body to find a way around it—usually by compromising your form.
- Strength & Activation: Are the right muscles firing when they're supposed to? Your glutes and core are the engine of your squat. If they're weak or "asleep" during the lift, your lower back and quads end up doing all the work. That's not just inefficient; it's a recipe for injury.
- Technique: Are you moving correctly? Even if you're mobile and strong, sloppy movement patterns will sabotage your lift every time. This is all about drilling the right motor pattern until it becomes automatic.
A weak squat isn't just holding back your numbers—it's a major injury risk. It’s your body's check-engine light, signaling that you're compensating for something, putting stress on joints and tissues that weren't meant to carry that load.
To help you get started, here’s a quick way to narrow down the problem. Pay attention to what you feel during your next squat session and check this table.
Quick diagnosis for your weak squat
| Symptom You Feel | Potential Cause | Where to Focus First |
|---|---|---|
| Can't get deep enough; heels lift up. | Ankle mobility or hip mobility restriction. | Ankle mobility drills and hip openers. |
| You feel it all in your lower back. | Weak core or glute activation failure. | Core bracing exercises and glute activation work. |
| Your knees cave inward ("valgus collapse"). | Weak glutes (specifically the gluteus medius). | Banded squats and glute-focused accessory work. |
| You fall forward on the way up. | Weak quads or poor core stability. | Quad-strengthening exercises like front squats. |
This table is your starting point. It’s not a final diagnosis, but it’ll point you in the right direction so you can stop guessing and start making targeted improvements.
It’s about more than just the weight on the bar
Ignoring the signs of a weak squat can lead to much bigger problems than a stalled PR. Bad form is a loud and clear predictor of injury. In fact, a 2018 study of NCAA Division I athletes found that movement flaws like knees caving in or an excessive forward lean were directly tied to a higher rate of lower-body injuries. You can read up on the connection between squat performance and injury incidence among athletes yourself.
This shows just how important it is to fix your squat—not just for performance, but for your long-term health in the gym. When you take the time to identify and correct these issues, you aren't just building a stronger squat. You're building a more resilient body.
Your practical squat assessment checklist
Before you can build a stronger squat, you need to know exactly where you’re starting. This isn't about judging your form—it's about gathering clues. Think of yourself as a detective figuring out what’s holding your squat back.
The process is straightforward. You’re going to record yourself doing two simple squat variations from a couple of different angles. This quick self-assessment is the most important step you can take. It’s what separates guessing from a targeted, intelligent training plan.
Setting up your self-assessment
All you need is your phone. You're going to film two different squat sets to get the full picture.
- Bodyweight Squats: Perform 8-10 reps. This shows your natural, unloaded movement pattern.
- Goblet Squats: Do another 8-10 reps with a light dumbbell or kettlebell. Holding weight out front often cleans up form, but it can also expose a weak core or poor balance.
Record both sets from two angles: directly from the front and directly from the side. This gives you a complete view of what's happening.
What to look for from the front view
The front view is perfect for spotting any side-to-side or rotational issues, especially at your hips and knees. As you watch the video, pause it at different points in the movement—especially at the very bottom.
Here are the big things to watch for:
- Knees Caving In (Knee Valgus): Do your knees collapse inward on the way down or, more often, as you drive back up? This is a classic sign of weak glutes. Specifically, it points to the gluteus medius, a muscle on the side of your hip that's supposed to keep your knees tracking over your feet.
- Hip Shift: Does your whole body lean to one side as you squat? This almost always points to an imbalance. It could be a strength difference between your left and right glutes or tightness in one hip, causing you to unconsciously favor your stronger side.
These two issues are incredibly common and are often the root cause of a squat that feels unstable and weak.
What to look for from the side view
The side view tells you everything about your posture, balance, and depth. This is where problems like a rounding back or leaning too far forward become impossible to miss.
Keep your eyes peeled for these key giveaways:
- Chest Dropping Forward: As you squat down, does your chest fall forward until your squat looks more like a "good morning" exercise? This usually points to one of two things: a weak core that can’t keep your torso upright, or tight hips that force you to lean forward to get deeper.
- Lower Back Rounding (Butt Wink): Look closely at your lower back right at the bottom of the squat. Do you see your hips tuck under, causing your spine to round? This is known as "butt wink" and can be caused by tight hamstrings, limited hip mobility, or just a lack of motor control at the very end of your range of motion.
- Heels Lifting Off the Ground: Do your heels pop up as you sink into the squat? This is a dead giveaway for limited ankle dorsiflexion—the ability to bend your ankle and pull your toes up. When your ankles run out of room, your body cheats by lifting your heels to find more depth.
This flowchart breaks down the entire diagnostic process, helping you trace your issue from the joint, to the muscle, and finally to the technique.

As you can see, the root of a weak squat often starts at the joint level, long before it shows up as a strength or technique problem.
Key Takeaway: By filming yourself from both angles, you can connect the "what" (e.g., my knees cave in) with the "why" (e.g., my glutes are weak). This insight stops you from just "squatting more" and helps you start training smarter.
Once you’ve spotted one or two of these issues, you have your starting point. Don’t get overwhelmed if you see a few problems at once—most of them are connected. For example, improving your ankle mobility can often help reduce butt wink and keep your chest from dropping. You now have the data you need to start building a much better squat.
Build your foundation with mobility and technique drills
Okay, you've pinpointed the weak links in your squat. Now it's time to get to work. A truly powerful squat is built from the ground up, and that starts with great mobility and flawless technique. Just squatting more with bad habits will only dig you deeper into a hole.
Instead, we’re going to strip things back. We'll address the specific issues you found in your assessment, laying a new foundation before we start adding weight. This is where the real change happens.
Unlock your joints with targeted mobility work
If your self-check showed tight ankles, sticky hips, or a rounded upper back, mobility isn't just a warm-up—it's your main priority. These aren't random stretches. They’re targeted drills designed to open up your joints, which is non-negotiable for hitting depth and staying upright.
A general dynamic stretching routine is good, but it often isn't enough to fix the deep-seated restrictions holding back your squat. We need to be more specific.
Here are my go-to drills for the most common issues:
- For Tight Ankles (Heels Lifting): Try Ankle Rockers. Face a wall and step one foot forward. Keeping your heel glued to the floor, drive your knee forward over your toes as far as you can. This directly improves ankle dorsiflexion, the key to squat depth.
- For Tight Hips (Butt Wink/Chest Drop): Get comfortable with Deep Squat Sits. Hold onto a squat rack for balance and slowly sink into the deepest squat you can manage. Gently rock side-to-side to pry open your hips.
- For a Stiff Upper Back: Perform Thoracic Spine Rotations on all fours. Put one hand behind your head and rotate that elbow toward the ceiling, letting your eyes follow. This drill is a game-changer for keeping a proud, upright chest.
Make these drills a non-negotiable part of your warm-up every time you train legs. Consistency is what turns tight joints into mobile ones. A few focused minutes here pays huge dividends.
And let's clear something up: the old myth that deep squats are "bad for your knees" is largely unfounded for healthy lifters. Research actually shows that progressive deep squatting can strengthen and protect the knees, making them more resilient.
Groove the pattern with technique drills
With your joints prepped, it's time to teach your body how to use that newfound range of motion. Technique drills are all about slowing down and chasing perfect reps. This is how you overwrite bad habits and build a squat that’s both strong and safe.
These exercises force you to focus on control, stability, and engaging the right muscles. Pick a light weight—enough to feel it, but not so much that your form breaks down.
Master depth and control with the box squat
The box squat is one of the best teaching tools out there, especially if you struggle with hitting depth or feel unstable at the bottom. Set a box or bench to the right height (ideally where your hips are just below your knees) for instant feedback.
The key is to sit back onto the box, not just drop down on it. Pause for a beat, stay tight, and then explode up. This drill forces you to use your hips and glutes, which is exactly what you need to break through a plateau.
Build unshakeable control with tempo squats
If your squats feel rushed or wobbly, tempo squats will be your new best friend. The goal is to perform each rep at a specific, slow cadence. A great starting point is a 4-1-1-0 tempo:
- 4 seconds to lower yourself down (the eccentric)
- 1 second pause at the bottom
- 1 second to drive up explosively (the concentric)
- 0 seconds rest at the top before the next rep
That painfully slow descent kills all momentum and forces every muscle to stay engaged. It puts a spotlight on your weak points and builds incredible stability from the ground up.
Develop strength in the hole with paused squats
The bottom of the squat—"the hole"—is where most lifts live or die. Paused squats directly attack this weak point by making you own the toughest part of the lift.
Perform a normal squat, but once you hit the bottom, hold the position for a full 2-3 seconds. You have to stay completely tight; no relaxing or bouncing. This builds serious isometric strength and gives you the confidence you need to power out of the bottom when you go back to regular squats.
Targeted accessory lifts to eliminate weak points
Your squat is only as strong as its weakest link. Once you've figured out any mobility or technique issues, the next move is to hammer those weak points with targeted accessory lifts. Think of these as specialists you call in to fix the specific muscles that are giving up on you mid-squat.
This isn't about throwing random exercises at the wall to see what sticks. It's about being strategic. By choosing the right support work, you can directly attack the root cause of your weak squat—whether it's sleepy glutes, a core that folds under pressure, or quads that just aren't pulling their weight. This is how you do the right work, not just more work.
For glute weakness and instability
If you spotted your knees caving in or felt your lower back taking over the lift, weak glutes are the usual suspect. The glutes are the engine of your squat; they drive you out of the hole and keep your knees from collapsing inward. To fix this, we need exercises that wake them up and make them strong.
- Hip Thrusts: This is the undisputed king of glute-building exercises. It's pure hip extension, isolating the gluteus maximus without much help from other muscles. To really make it count, focus on a powerful squeeze at the top and control the negative on the way down.
- Glute Bridges: A fantastic bodyweight or lightly loaded version of the hip thrust. This move is perfect for glute activation and building a solid mind-muscle connection. Think about driving through your heels and pushing your hips straight to the ceiling.
Adding these to your routine teaches your glutes how to fire on command, a skill that translates directly to a more powerful and stable squat.
For a core that collapses
Does your chest drop forward the second the reps get challenging? That’s a classic sign of a core that isn't strong enough to hold your torso upright when things get heavy. Your core isn't just your abs; it's the entire muscular corset that stabilizes your spine.
A strong core acts like a natural weightlifting belt, creating internal pressure that protects your spine and keeps your torso rigid. When it fails, your form breaks down immediately.
To build that kind of stability, you need "anti-movement" exercises that teach your core to resist being pushed around.
- Pallof Press: This exercise is all about teaching your core to resist rotation. By holding a cable or band at your chest and pressing it straight out, you’re fighting the tension that's trying to twist your torso. This builds the exact kind of stability you need to stay tight in a squat.
- Dead Bug: Lying on your back, you'll slowly lower your opposite arm and leg while keeping your lower back glued to the floor. It looks simple, but it’s a killer for developing the deep core control needed to stop your chest from collapsing forward.
For instance, to strengthen your posterior chain and lower back, crucial for maintaining an upright squat posture, consider including exercises like the hyperextension.
For lagging quads
If you find yourself tipping forward as you drive out of the bottom of the squat, it can also mean your quads aren't strong enough to do their job. When this happens, your body instinctively shifts the load back to your hips and posterior chain to compensate. Unilateral (single-leg) work is a fantastic way to isolate and build up weaker quads.
The Bulgarian split squat is non-negotiable for this. By elevating your back foot, you put a massive amount of stress on the front leg's quad and glute. This exercise not only builds serious single-leg strength but also sharpens your balance and hip stability.
When you're doing Bulgarian split squats, don't be afraid to start with just your bodyweight. The real goal is mastering a full range of motion and staying balanced before you even think about picking up dumbbells or kettlebells.
Programming your accessory lifts
So, how do you fit all this into your training? The idea is to add them after your main squat session without creating so much fatigue that it wrecks your recovery. A good rule of thumb is to pick 2-3 accessory lifts that directly target the weaknesses you've identified.
Here’s a sample setup you could tack onto the end of your squat day:
| Goal | Exercise | Sets & Reps |
|---|---|---|
| Strengthen Glutes | Barbell Hip Thrust | 3-4 sets of 8-12 reps |
| Improve Core Stability | Pallof Press | 3 sets of 10-15 reps per side |
| Build Quad Strength | Bulgarian Split Squat | 3 sets of 8-10 reps per leg |
Make sure you try to progressively overload these lifts, just like you would with your main squat. Add a little weight, another rep, or an extra set over time. This targeted approach is the fastest way to turn your weak points into strengths and build a much bigger, more solid squat.
Your blueprint for squat progression
Knowing what to do is just the first step. To actually fix a weak squat, you need a plan—a practical blueprint that puts all this information into action. This is where we pull everything together: the mobility drills, the technique work, and the right accessory exercises, all organized into a program designed for real results.
I’ve laid out two different sample programs below. The first one is for beginners who need to lock in their form and build a solid foundation. The second is for intermediate lifters who already have decent technique but are stuck on a plateau and need a push.
Beginner program: building a strong foundation
If you're new to lifting or you've found some major weak spots in your form, this is your starting point. The goal here isn't to chase heavy weights. It's all about building muscle, grooving perfect movement patterns, and creating a base of strength you can rely on for years to come.
We’ll hit legs twice a week. One day is all about your main squat movement, and the second day is dedicated to shoring up your weak points with targeted accessory work.
Day 1: Squat Focus
- Warm-Up: Ankle Rockers (2 sets of 15 reps per side), Deep Squat Sits (60 seconds)
- Main Lift: Goblet Squats (4 sets of 8-10 reps) - Use a tempo of 3-1-1-0.
- Accessory 1: Glute Bridges (3 sets of 15 reps) - Squeeze hard at the top.
- Accessory 2: Plank (3 sets, hold for 30-45 seconds)
Day 2: Accessory & Weak Point Focus
- Warm-Up: Thoracic Rotations (2 sets of 10 reps per side), Leg Swings (2 sets of 15 reps)
- Main Lift: Bulgarian Split Squats (3 sets of 10-12 reps per leg) - Use bodyweight or light dumbbells.
- Accessory 1: Romanian Deadlifts (3 sets of 12 reps) - Really focus on that hamstring stretch.
- Accessory 2: Pallof Press (3 sets of 12 reps per side)
Intermediate program: smashing plateaus
This program is designed for lifters who have their form dialed in but can’t seem to add more weight to the bar. We're going to introduce more advanced techniques and higher intensity to bust through those strength plateaus and bring up lagging muscles with more volume.
This plan assumes your technique is already solid and shifts the focus to strategic overload.
Day 1: Strength Focus
- Warm-Up: Your preferred mobility routine.
- Main Lift: Barbell Back Squats (Work up to 3 heavy sets of 5 reps)
- Technique Lift: Paused Squats (3 sets of 5 reps at 70% of your main lift)
- Accessory 1: Barbell Hip Thrusts (4 sets of 8 reps)
- Accessory 2: Weighted Plank (3 sets, hold for 45-60 seconds)
Day 2: Hypertrophy & Accessory Focus
- Warm-Up: Your preferred mobility routine.
- Main Lift: Leg Press (4 sets of 10-15 reps)
- Accessory 1: Dumbbell Romanian Deadlifts (3 sets of 10-12 reps)
- Accessory 2: Walking Lunges (3 sets of 20 total steps)
- Accessory 3: Reverse Hypers or Back Extensions (3 sets of 15 reps)
The key to progress: progressive overload
Following a program is a great start, but you won't get stronger unless you consistently make things a little harder. This principle is called progressive overload, and it's the single most important part of getting stronger long-term. It just means you have to gradually increase the demands you place on your body.
But it’s not just about piling more weight on the bar. You can apply progressive overload in a few different ways:
- Increase Reps: If you squatted 135 lbs for 5 reps last week, aim for 6 reps this week.
- Increase Sets: Once you can hit your target reps for all sets, you can add another set to the exercise.
- Increase Weight: When you hit the top of your rep range (e.g., 5 reps) with good form, add a small amount of weight (5-10 lbs) and go back to the bottom of the rep range.
- Improve Technique: Simply making each rep cleaner and more efficient is its own form of progress.
This methodical approach is what separates those who make gains from those who stay stuck. You can track your numbers in a simple notebook or use a Personalized strength training app like GrabGains to make sure you’re always moving forward.
Key Insight: Building squat strength isn't just for showing off in the gym; it's one of the best things you can do for injury prevention. A strong squat provides stability for your entire lower body, protecting your knees and back from injury during sports and everyday life.
In fact, the connection between squat strength and injury risk is well-established. One cohort study on Division I athletes found that males unable to squat at least 2.2 times their body weight and females unable to squat 1.6 times their body weight had a much higher chance of lower limb injuries. You can read the full research on athlete strength standards to see how these benchmarks can inform your own goals. This data makes it clear: a strong squat is one of the best insurance policies you can have.
Navigating the sticking points: common squat questions
When you're grinding to fix a weak squat, it's easy to get stuck in your own head. Doubts creep in, and you start questioning if you're even on the right path. Let's clear up some of the most common questions I hear from lifters so you can move forward with confidence.
How long will it take to fix my weak squat?
The honest answer? It depends entirely on why your squat is weak in the first place. There’s no magic timeline.
If it's a simple technique issue—like learning to brace your core properly or keeping your chest up—you could feel a huge difference in just a few weeks. But if the problem runs deeper, like poor ankle mobility or significant muscle imbalances, you're looking at a longer game. For meaningful, lasting changes, plan on dedicating a solid 2-3 months of consistent work.
Key Takeaway: Fixing a weak squat is a process, not a quick fix. Be patient and focus on building a better foundation. Track your progress—even the small wins—to stay motivated for the long haul.
Should I lower the weight if my form feels off?
Yes. Immediately and without a second thought. Don't think of it as a setback; see it as a "form reset."
Lifting heavy with bad technique just drills those poor movement patterns into your muscle memory and sky-rockets your injury risk. It’s like trying to build a skyscraper on a cracked foundation—it’s not a matter of if it will crumble, but when.
Drop the weight to a point where every single rep is perfect. That might mean an empty barbell or just your bodyweight. Focus on controlling the entire movement: the descent, the pause, and the drive back up. Strength built on flawless technique is the only kind that lasts.
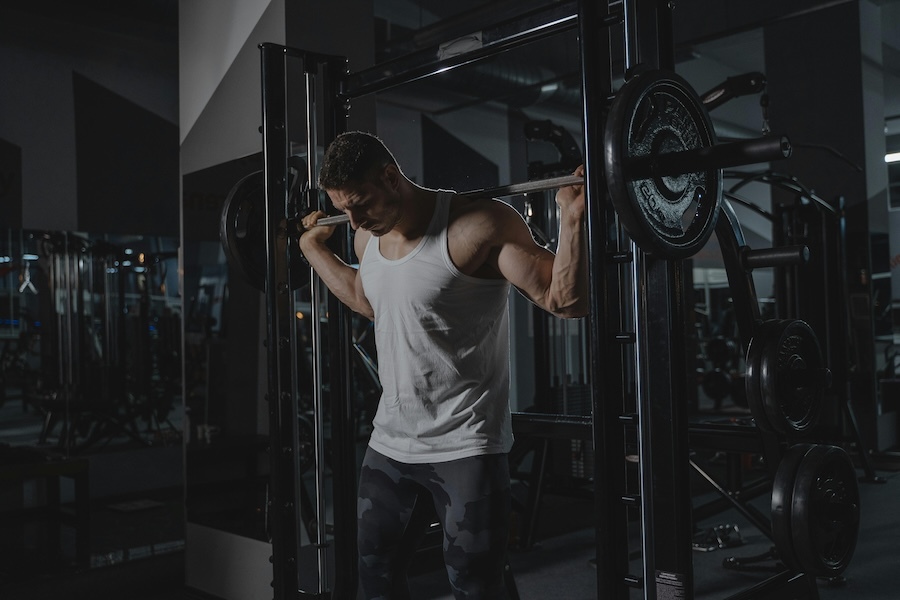
Is it better to use a smith machine if my squat is weak?
The Smith machine might feel like a safe bet, but it's the wrong tool for this job. It operates on a fixed, two-dimensional path, which means it does all the stabilizing work for you. That stabilization is precisely what you need to build functional, real-world strength.
The small muscles that keep you balanced and in control during a free-weight squat just don't get trained on a Smith machine. Instead of using a machine that just masks the problem, you're far better off regressing to a simpler free-weight version. Stick with the barbell or switch to goblet squats to build the stability and control you actually need.
How much do nutrition and recovery affect my squat strength?
They're everything. You can't out-train a poor lifestyle. Strength isn't just built in the gym; it's forged while you recover.
- Sleep: Skimping on sleep is the fastest way to kill your gains. Anything less than 7-9 hours a night tanks your nervous system recovery and muscle repair, directly hurting your strength.
- Nutrition: Your body needs fuel to perform and rebuild. If you aren't eating enough calories—and especially enough protein—your muscles simply don't have the building blocks needed to get stronger.1
Think of it this way: your body is a high-performance machine. You have to give it premium fuel and let it rest if you expect it to perform at its peak.
Ready to stop guessing and start building a truly personalized plan to fix your weak squat? The GrabGains app uses AI to analyze your performance and build adaptive workouts that target your specific weaknesses. With over 350+ exercise videos and smart progress tracking, you'll have everything you need to train smarter and see real results. Pre-register for GrabGains today and get ready to turn your squat into your strength.
Get inspired and motivated


