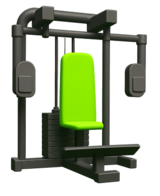
Lever Seated Fly
The Lever Seated Fly is a machine-based isolation exercise designed to target the chest through a controlled horizontal adduction movement.


Lever Seated Fly
Muscles Worked: Lever Seated Fly
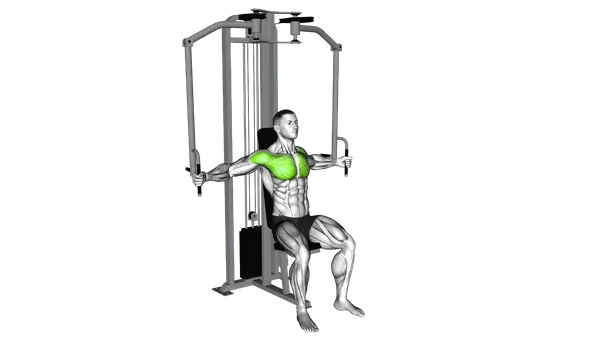
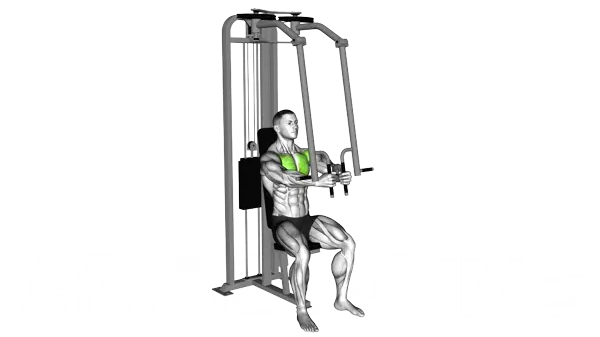
The Lever Seated Fly mainly works your chest, especially the pecs that bring your arms together against the pads. Your shoulders, mainly the front delts, help guide the arms through the arc and keep the movement smooth. Because the machine fixes the path, your chest can stay under tension without your balance limiting the set. You should feel the pecs doing most of the work, especially in the squeezed position, and longer rests usually help you keep rep quality higher on pressing and chest work.
Technique and form
How to perform the Lever Seated Fly
- Sit on the machine with your back flat against the pad and adjust the seat height so the handles align with your chest.
- Grasp the handles with a neutral grip (palms facing each other) and keep your elbows slightly bent, maintaining this same angle throughout the movement.
- Brace your core and press your back firmly against the support pad to establish a stable base.
- Exhale as you pull the handles together in a smooth, controlled arc, squeezing your chest muscles as they contract.
- At the end position, your hands should be nearly touching in front of your chest with elbows still slightly bent.
- Hold the contracted position for a brief moment, focusing on maximum chest engagement.
- Inhale as you slowly return to the starting position, controlling the weight and maintaining tension in your chest muscles.
- Allow your arms to open until you feel a comfortable stretch across your chest, then repeat for the desired number of repetitions.
Important information
- Keep your shoulders pulled back and down throughout the exercise to prevent shoulder rounding and maximize chest activation.
- Avoid using momentum or jerking movements to complete the exercise; focus on slow, controlled motion for better muscle engagement.
- Adjust the seat height before beginning to ensure the handles align properly with your mid-chest for optimal leverage.
- If you experience shoulder pain, slightly adjust your grip or reduce the range of motion to find a comfortable position.
Is the Lever Seated Fly good for muscle growth?
Yes. The Lever Seated Fly is a strong muscle-building exercise for your chest because it keeps tension on the pecs through the whole rep and makes it easy to train close to failure without needing much setup. It also creates very little whole-body fatigue, so you can add chest volume without beating yourself up, which is useful when you already do presses in the same workout.
- Constant chest tension — The machine keeps the path locked in, so your pecs stay loaded from the stretched position to the squeeze. That makes it easier to feel the chest working instead of letting momentum or body English take over.
- Easy to push safely — Since you are seated and supported, you can take sets hard with less worry about balance or getting pinned under a bar. That makes this a smart follow-up to presses like the lever-pec-deck-fly family and heavier chest work.
- Great for adding volume — The exercise is an isolation move, so it trains the chest hard without asking much from your triceps or lower body. That helps you build more weekly chest work on top of presses without your recovery crashing.
- Rest matters for output — If you rush your rest periods, later sets usually lose reps and quality. Research on upper-body resistance training shows longer inter-set rest helps maintain performance better than short rest, which matters when you want hard, repeatable chest sets. Inter-set stretching can also reduce reps in some lifting setups, so keep the break simple and save stretching for after the exercise.
Programming for muscle growth
Do 3-4 sets of 10-15 reps with 60-90 seconds rest, 1-2 times per week. Use a weight that lets you control the stretch and squeeze without the pads bouncing. This rep range fits the exercise well because the machine is stable, the chest stays loaded, and you can safely push close to failure on the last 1-2 sets.

Alternative Exercises


Built for progress
Take the guesswork out of training
Create personalized AI-powered workout plans that evolve with you. Train smarter, track every rep and keep moving forward, one workout at a time.


FAQ - Lever Seated Fly
The Lever Seated Fly primarily targets the pectoral muscles (chest), with significant secondary activation of the anterior deltoids (front shoulders). The coracobrachialis and serratus anterior also engage as synergists during this controlled arc movement.
Start by adjusting the seat height so your arms align with the machine's pivot point, keep your back firmly against the pad, and initiate the movement from your chest rather than your shoulders. Focus on squeezing your chest muscles at the point of maximum contraction, and control the weight throughout the entire range of motion.
For optimal results, include Lever Seated Flys 1-2 times weekly as part of your chest training days. This frequency allows adequate recovery while providing sufficient stimulus for growth, especially when programmed as an accessory movement after compound pressing exercises.
While beginners can technically perform this exercise, it's more beneficial for intermediate lifters who have developed basic chest strength and mind-muscle connection. Beginners should first master fundamental movements like push-ups and chest presses before progressing to isolation exercises like the Lever Seated Fly.
Avoid bending your elbows to compensate for limited shoulder mobility, as this negates the stretching benefits. Don't rush through repetitions or use momentum—move slowly and deliberately. Also, never force the movement beyond the point of mild discomfort, as this could lead to shoulder strain.
Lever Seated Fly
Thank you for your feedback!
Thank you for your feedback!