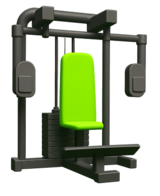
Lever Seated Shoulder Press
The Lever Seated Shoulder Press uses a guided machine path to build shoulder strength with controlled pressing and steady tension.


Lever Seated Shoulder Press
Muscles Worked: Lever Seated Shoulder Press
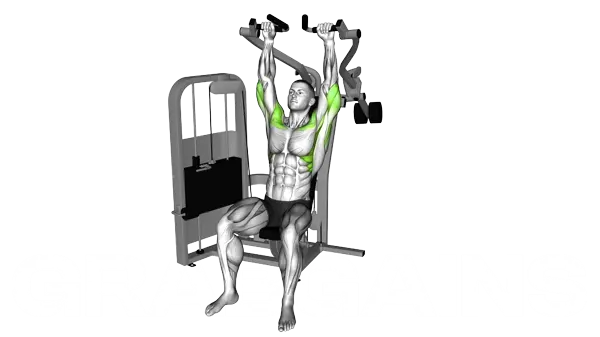
The Lever Seated Shoulder Press mainly works your shoulders, especially the front delts and side delts, because they drive the handles up and overhead. Your triceps help finish each rep by straightening your elbows, which matters most near the top. The machine also gives you a fixed path, so you can focus more on pushing hard instead of balancing the weight. You should feel your delts doing most of the work, with your arms helping, and a smooth machine path can improve pressing output in upper-body push training.
Technique and form
How to perform the Lever Seated Shoulder Press
- Sit on the machine with your back against the pad, feet flat on the floor, and maintain a neutral spine position.
- Grasp the handles with an overhand grip, positioning your hands at shoulder width or slightly wider with wrists straight.
- Start with the handles at shoulder height, elbows bent and pointing down, and shoulders pulled back and down away from your ears.
- Brace your core muscles to stabilize your torso, ensuring your lower back maintains contact with the backrest throughout the movement.
- Exhale as you press the handles upward in a controlled motion until your arms are fully extended overhead but without locking your elbows.
- Keep your head in a neutral position, looking straight ahead, while avoiding the tendency to push your chin forward during the press.
- Inhale as you slowly lower the handles back to the starting position, controlling the descent and keeping tension in your shoulder muscles.
- Pause briefly at the bottom position before initiating the next repetition, maintaining proper posture throughout the set.
Important information
- Make sure your lower back stays in contact with the backrest to protect your spine – avoid arching or pushing your torso forward during the press.
- Keep your shoulders down and away from your ears throughout the entire movement to properly engage the deltoid muscles.
- Adjust the seat height so that the handles align with your shoulders in the starting position for optimal leverage.
- If you experience any shoulder pain, reduce the weight or modify your hand position to find a more comfortable range of motion.
Is the Lever Seated Shoulder Press good for muscle growth?
Yes. The Lever Seated Shoulder Press is a strong muscle-building exercise for your delts because it lets you press hard in a stable setup, making it easier to push close to failure safely and repeat good reps from set to set. In upper-body pushing work, a more stable setup can improve acute performance, which supports getting more quality training volume over time.
- Stable pressing path — The machine guides the movement, so you spend less effort balancing and more effort driving through your shoulders. That usually helps lifters keep tension on the front and side delts instead of turning the set into a full-body balancing act.
- Easy to train hard — Because you are seated with your torso supported, it is easier to keep reps honest and stop your lower back from taking over. That makes this a solid choice after free-weight presses like the Dumbbell Arnold Press when your goal is to pile up more shoulder-focused work.
- Simple overload — Most lever machines let you add small jumps in weight and repeat the same setup each session. That makes progress easier to track than with movements where balance changes the rep quality from set to set.
- Shoulder-friendly for many lifters — A fixed seat and handle path can help you find a pressing groove that feels smoother on the joints, especially if standing presses like the Barbell Standing Military Press make you lean back or lose position. Better comfort often means more consistent training, and consistency is what builds muscle.
Programming for muscle growth
Do 3-5 sets of 6-12 reps with 90-150 seconds rest. Use it 1-2 times per week, usually after your main heavy press or as your main shoulder press if machines feel better on your joints. Stay in a rep range where the last 1-3 reps are hard but still clean, because that gives you enough load for strength and enough total reps for muscle growth.
Alternative Exercises


Built for progress
Take the guesswork out of training
Create personalized AI-powered workout plans that evolve with you. Train smarter, track every rep and keep moving forward, one workout at a time.


FAQ - Lever Seated Shoulder Press
The Lever Seated Shoulder Press primarily targets the anterior (front) and lateral (side) deltoid heads while engaging the triceps as secondary movers. The fixed path of motion allows for concentrated tension on these muscle groups without requiring significant stabilizer involvement.
The machine version provides a fixed movement path that reduces the need for stabilization, allowing you to focus purely on output and deltoid engagement. This makes it particularly valuable for bodybuilding purposes and can be safer for those with minor shoulder issues since it controls the movement pattern.
Include this exercise 1-2 times weekly with at least 48 hours between sessions to allow for adequate deltoid recovery. It works well as either a primary compound movement or as a secondary exercise following more technically demanding presses in your shoulder or push day routine.
Avoid arching your lower back or lifting your buttocks off the seat when pressing heavier weights. Keep your core braced, maintain contact with the backrest throughout the movement, and don't lock out your elbows at the top position to maintain tension on the deltoids.
Yes, many machines offer unilateral (single-arm) options that allow you to address strength discrepancies between sides. Alternatively, you can perform the standard version but focus on equal force production from both shoulders, ensuring the machine moves evenly without tilting to one side.

Lever Seated Shoulder Press
Thank you for your feedback!
Thank you for your feedback!