Home Gym Equipment List That Actually Fits Your Goals
Build a smart home gym equipment list by goal, space, and budget. Covers must-haves, upgrade paths, flooring, and setup ideas that match your training. You're standing in a corner of your home with a tape measure in one hand and a pile of gym equipment in your online cart. Dumbbells, a bench, maybe a rack, maybe a treadmill. The choices keep growing, but you still can't tell what's worth the space or what you'll use.
A good home gym equipment list isn't a catalog of everything you could buy. It's a short, staged set of tools chosen for your training goal, available floor space, and budget. Buy for the workouts you want to do, then upgrade when your current setup gives you a clear reason to.
Why Your Home Gym Equipment List Should Start With Your Goal
Start with the training you want to do, not the equipment you've seen online. If you want to build strength and muscle, you'll need adjustable resistance and a way to press, pull, squat, and hinge. If you want to save time, a compact setup you can leave ready may matter more than a collection of machines. If the gym has to fit in a small corner, storage and clearance should shape every purchase.
Generic top-ten lists fail because they treat every trainee as if they have the same goals, room, and budget. They encourage you to compare products before you know what problem you're solving. Decide those constraints first, and it becomes easier to reject gear that looks impressive but won't earn its space.
Make three decisions before you shop
- Training goal: Choose the main job of the setup, such as strength training, muscle building, cardio, conditioning, or mobility.
- Available footprint: Measure where you'll train and where equipment will be stored. Check doorways, ceiling height, and whether you need to pack gear away after each session.
- Total spend ceiling: Decide what you can spend on the whole setup, including flooring and storage, rather than letting one appealing item consume the budget.
A home setup can also make exercise easier to fit into a routine. If regular movement is part of your aim, this guide to improve deep sleep through movement offers useful context on the connection between exercise and sleep.
Built for progress
Take the guesswork out of training
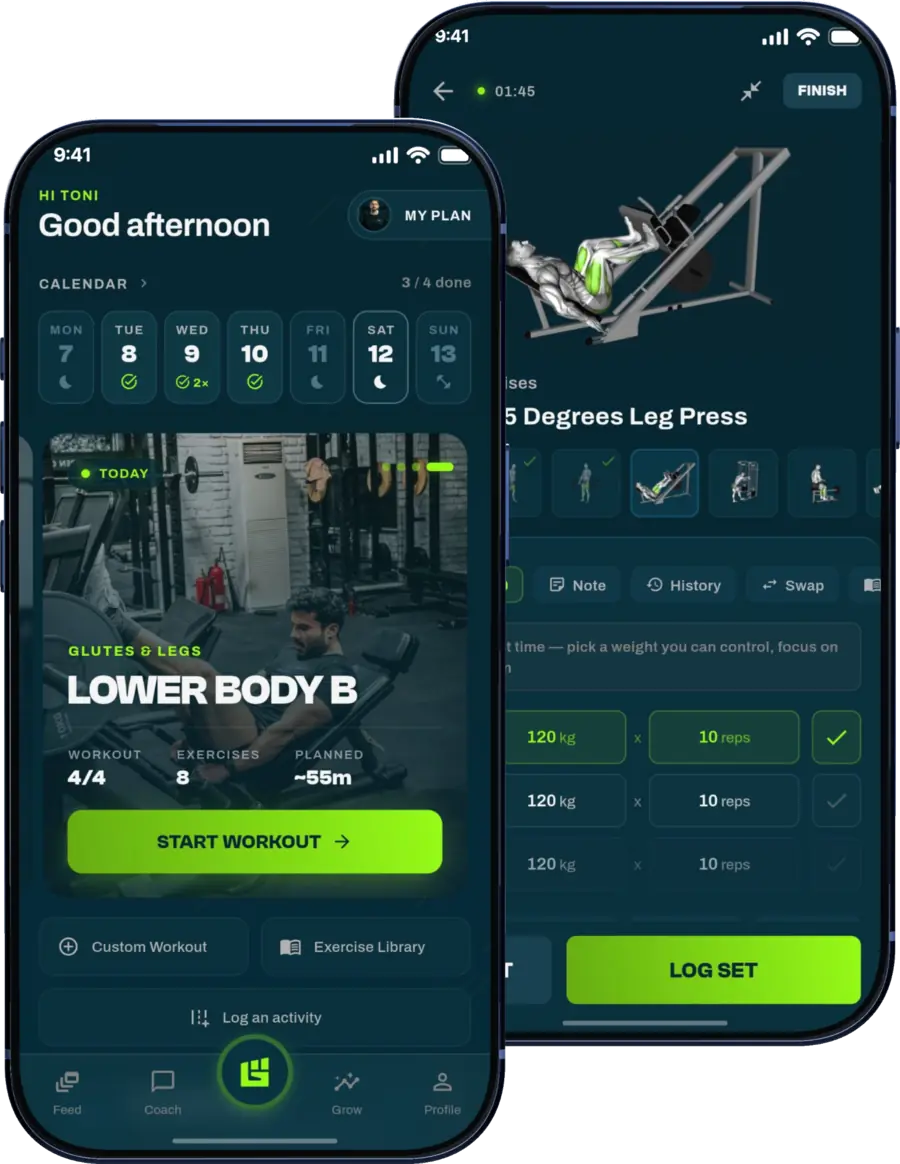
Get a personalized workout plan built around your goal, equipment and schedule. Train smarter, track every rep and keep moving forward, one workout at a time.






In a nationally sampled 1997 study sponsored by the Fitness Products Council, more than 1,600 interviews informed an estimate that 74% of owner-users had three or more pieces of equipment. But owning gear wasn't the same as using it: among roughly 99.3 million U.S. households at the time, 32.3 million both owned and regularly used equipment, while 17.6 million owned equipment but didn't use it regularly (study details). The lesson isn't to buy more. It's to choose a small collection that supports workouts you'll return to.
The Five Foundational Pieces Every Home Gym Shares
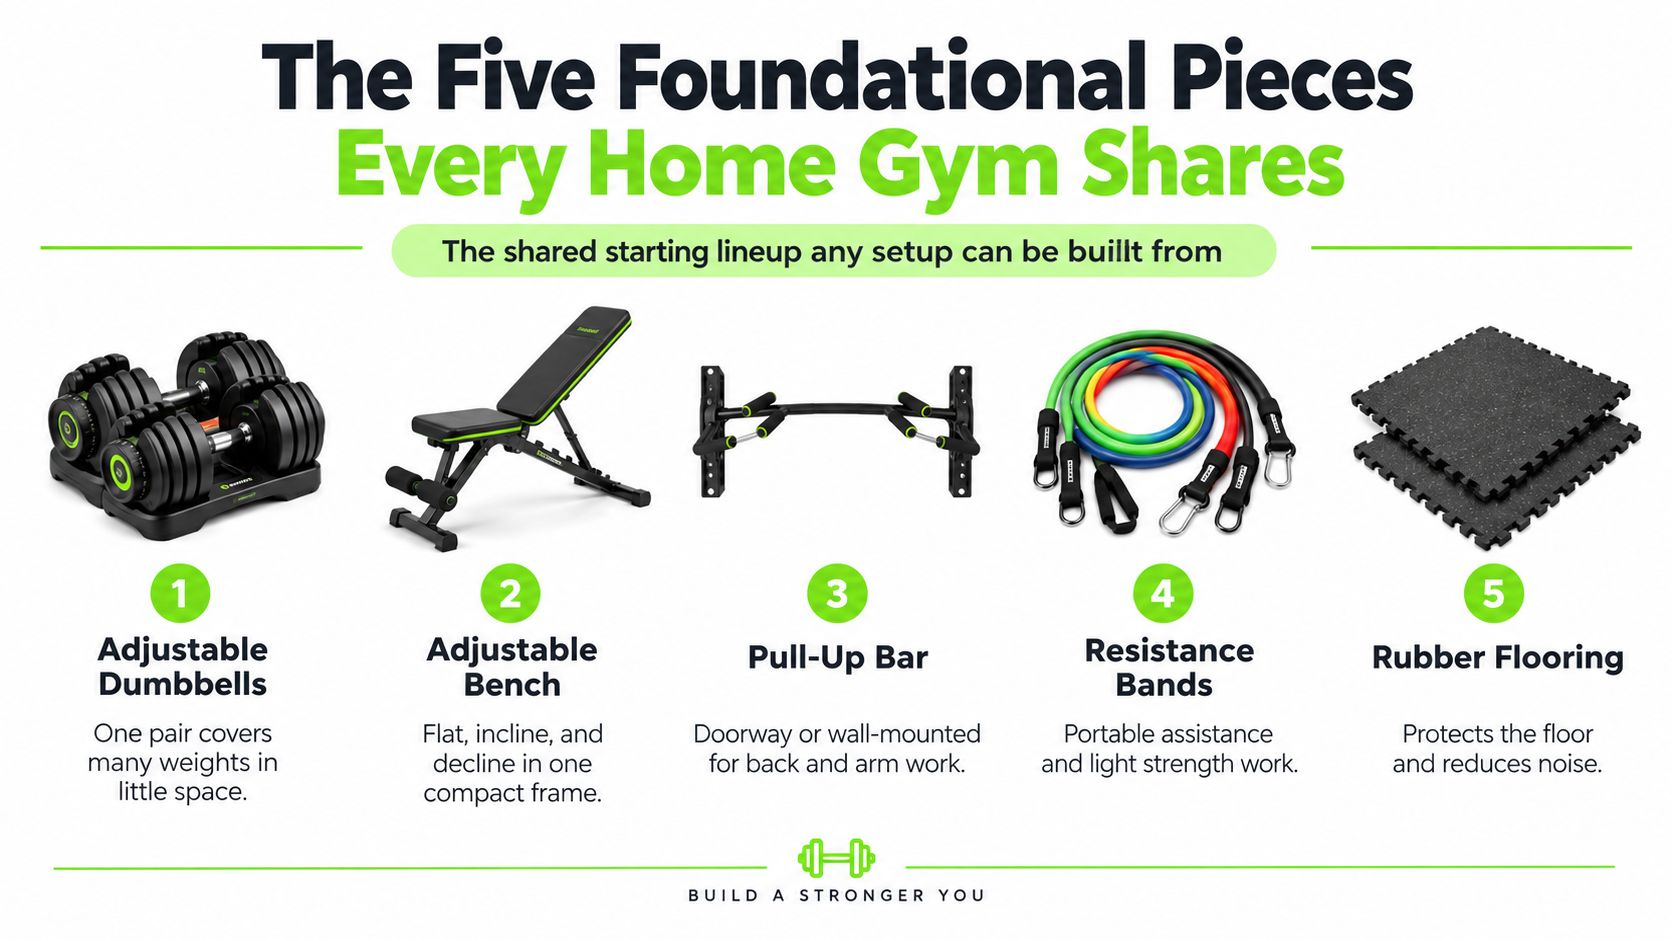
You don't need to outfit a room in one shopping trip. Start with equipment that covers several movements, stores sensibly, and makes it straightforward to train at home. For most beginners, these five pieces provide a stronger base than a room full of single-purpose machines.
Buy for coverage, not novelty
- Adjustable dumbbells. They cover presses, rows, lunges, squats, hinges, and carries while taking up less room than a collection of fixed pairs. They also give you a practical way to change resistance as your training progresses.
- An adjustable bench. A stable bench gives you more options for pressing and rowing. Changing its angle lets you vary upper-body exercises without adding another large piece of equipment.
- A pull-up bar. A doorway or securely installed wall-mounted bar gives you a place for vertical pulling. If you're not ready for unassisted pull-ups, bands can help you adjust the difficulty.
- Resistance bands. Bands are the best budget buy: they're compact, portable, and useful for warm-ups, face pulls, rows, and lighter accessory work. They can also provide assistance when a bodyweight movement is too difficult to perform unassisted. Research summarized from a 2019 meta-analysis of eight randomized trials found no significant difference in upper- or lower-body strength gains between elastic resistance training and conventional weights or machines (research summary).
- Rubber flooring. Flooring gives you a more suitable surface for training and helps protect the floor beneath your equipment. Choose it for the impact your workouts create, not for appearance alone.
This isn't a rigid shopping order for every person. If you train mostly on the floor, get a suitable mat early. If space is tight, a doorway pull-up bar and bands may be easier to fit than larger equipment. But adjustable dumbbells and a bench should be near the top of a beginner's list because they work together as a compact progression system.
A historical industry compilation reports that 38.6% of U.S. home-fitness equipment users spent less than $500 on a single item, supporting a staged approach that starts with foundational tools rather than expensive specialty equipment (industry statistics compilation).
Matching Equipment to Your Primary Training Goal
The best equipment list changes with the workout you want to do. A strength trainee shouldn't spend the same way as someone whose priority is low-impact cardio, and a mobility-focused setup doesn't need a rack. Use the table to give your budget to equipment that directly serves your main goal.
| Goal | Priority 1 | Priority 2 | Skip early |
|---|---|---|---|
| Strength and muscle | Adjustable dumbbells and an adjustable bench | Pull-up bar, bands, and later a barbell setup | Single-purpose machines that duplicate basic movements |
| Cardio and general fitness | Mat and resistance bands | One cardio machine that fits your preferred style and the room | Multiple machines before you know which one you'll use |
| HYROX and functional training | Open floor area, mat, and adjustable resistance | Rower or SkiErg alternative, plus heavier dumbbells or bands | Bulky strength machines that limit movement space |
| Mobility and lighter training | Mat and bands | A mobility stick or other simple aid | A rack or a large collection of weights |
Spend where your goal needs it
For strength and muscle, focus on equipment that supports repeatable progression. The American College of Sports Medicine recognizes free weights, machines, body weight, elastic tubing, medicine balls, and household substitutes as valid resistance-training tools. Its guidance also distinguishes strength-focused loading from explosive power work, so the useful question is whether your equipment lets you train the movements and effort your goal requires, not whether it's a particular machine (ACSM resistance-training position stand).
Cardio trainees should choose a machine only if they have a clear use for it and room to operate it. Consider noise, storage, and impact alongside the type of cardio you enjoy. A machine that becomes difficult to use in your home is a poor purchase, however capable it looks.
For functional conditioning, keep the centre of the training area clear. A mat, adjustable dumbbells, and bands can cover a range of circuits without filling the room with fixed stations. If you want a starting point for strength-focused sessions, explore the weight training app for home and gym.
Choosing Between Fixed Dumbbells, Adjustables, and a Barbell Setup
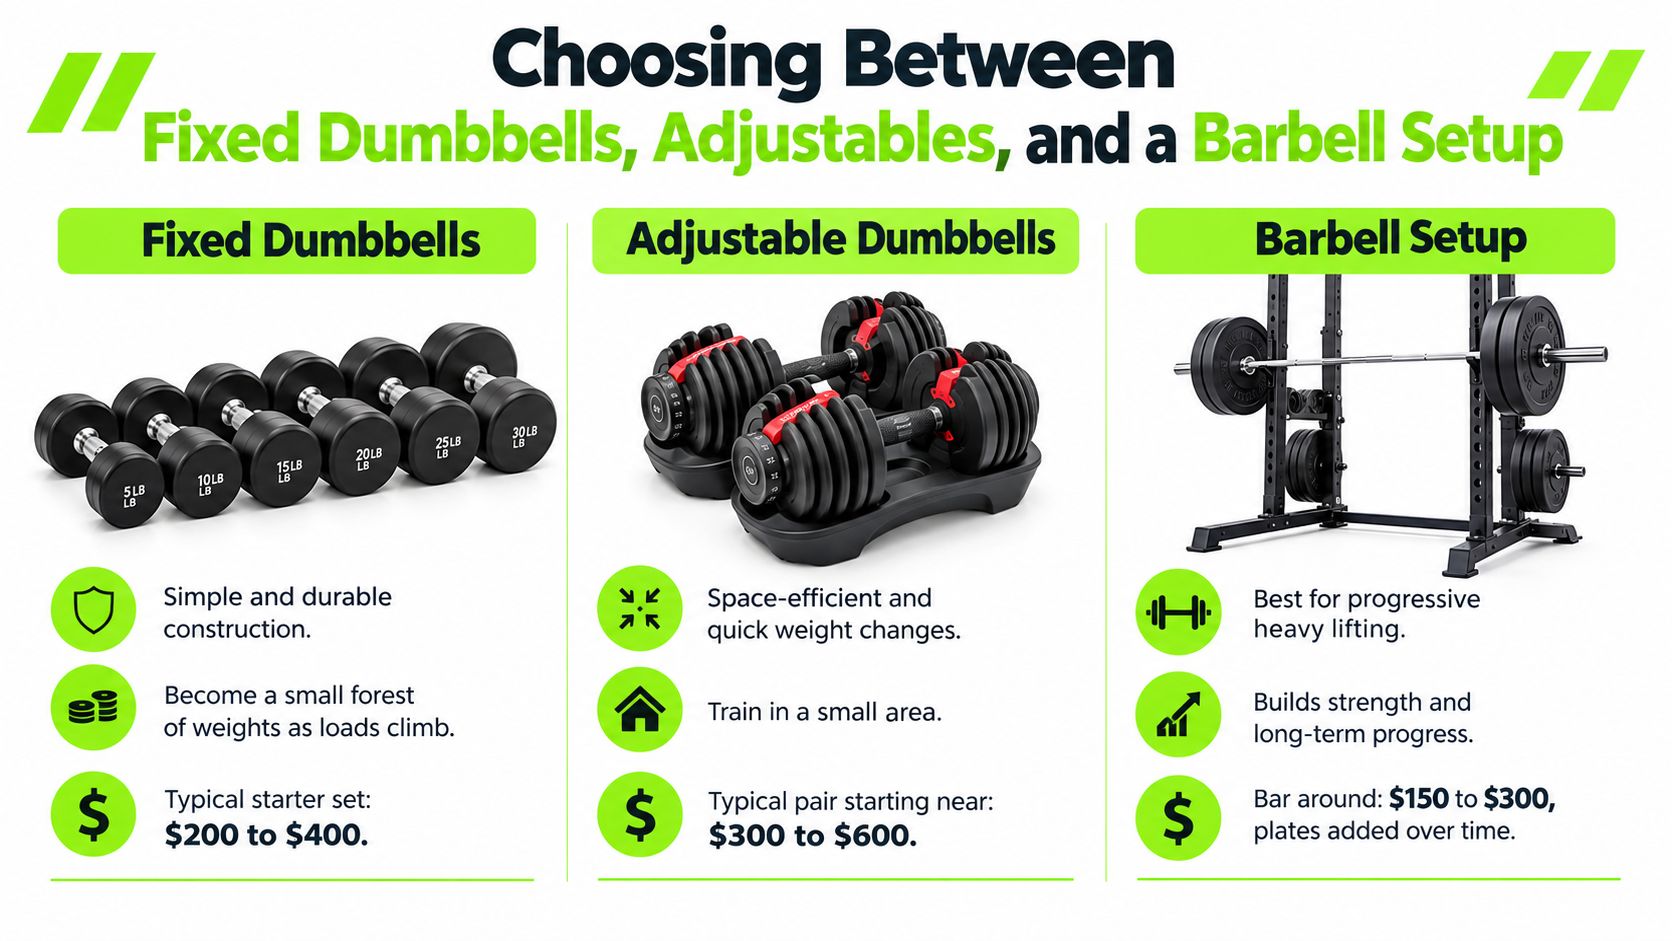
These three strength setups make different trade-offs. Fixed dumbbells are simple to pick up and use, but each increase in available load means more pairs to store. Adjustable dumbbells condense those options into a smaller footprint. A barbell and rack open the door to heavy barbell lifts, but require more room, appropriate flooring, and enough ceiling clearance.
Choose by space and progression
Fixed dumbbells are a good fit when you already have a dedicated storage spot and want weights that are always ready to use. The drawback is practical: as the range you need grows, so does the collection. They're easy to use but less space-efficient than an adjustable pair.
Adjustable dumbbells are my recommendation for most beginners. They offer a compact way to change resistance and pair naturally with an adjustable bench. Check the adjustment mechanism, how quickly you can change loads, and whether the maximum load will serve your training beyond the first few months.
A barbell and rack make sense when you specifically want to train heavy barbell squats, presses, or deadlifts, and you have the space to use the setup safely. Don't buy a rack just because it looks like the “real gym” option. It adds spatial demands and requires planning for the rack's assembled dimensions, overhead movement, and flooring.
Practical rule: Buy dumbbells and a bench first. Add a rack when you can name the lifts you can't train well with your current equipment and you have checked the room.
Resistance bands complement all three routes. They add warm-up and pulling options without requiring a large storage area. Whichever path you choose, think about whether you can make repeatable increases in resistance, rather than buying gear based on appearance or assumptions about what a serious gym should contain.
Three Realistic Setups by Space and Budget
Say your training space is the corner of a bedroom you share with a desk and a drying rack. Your equipment list should start there, with the square meters you can claim, and end with gear that fits it. A bigger list is not a better list. The setup worth paying for is the one you can train in four times a week without rearranging your life around it.
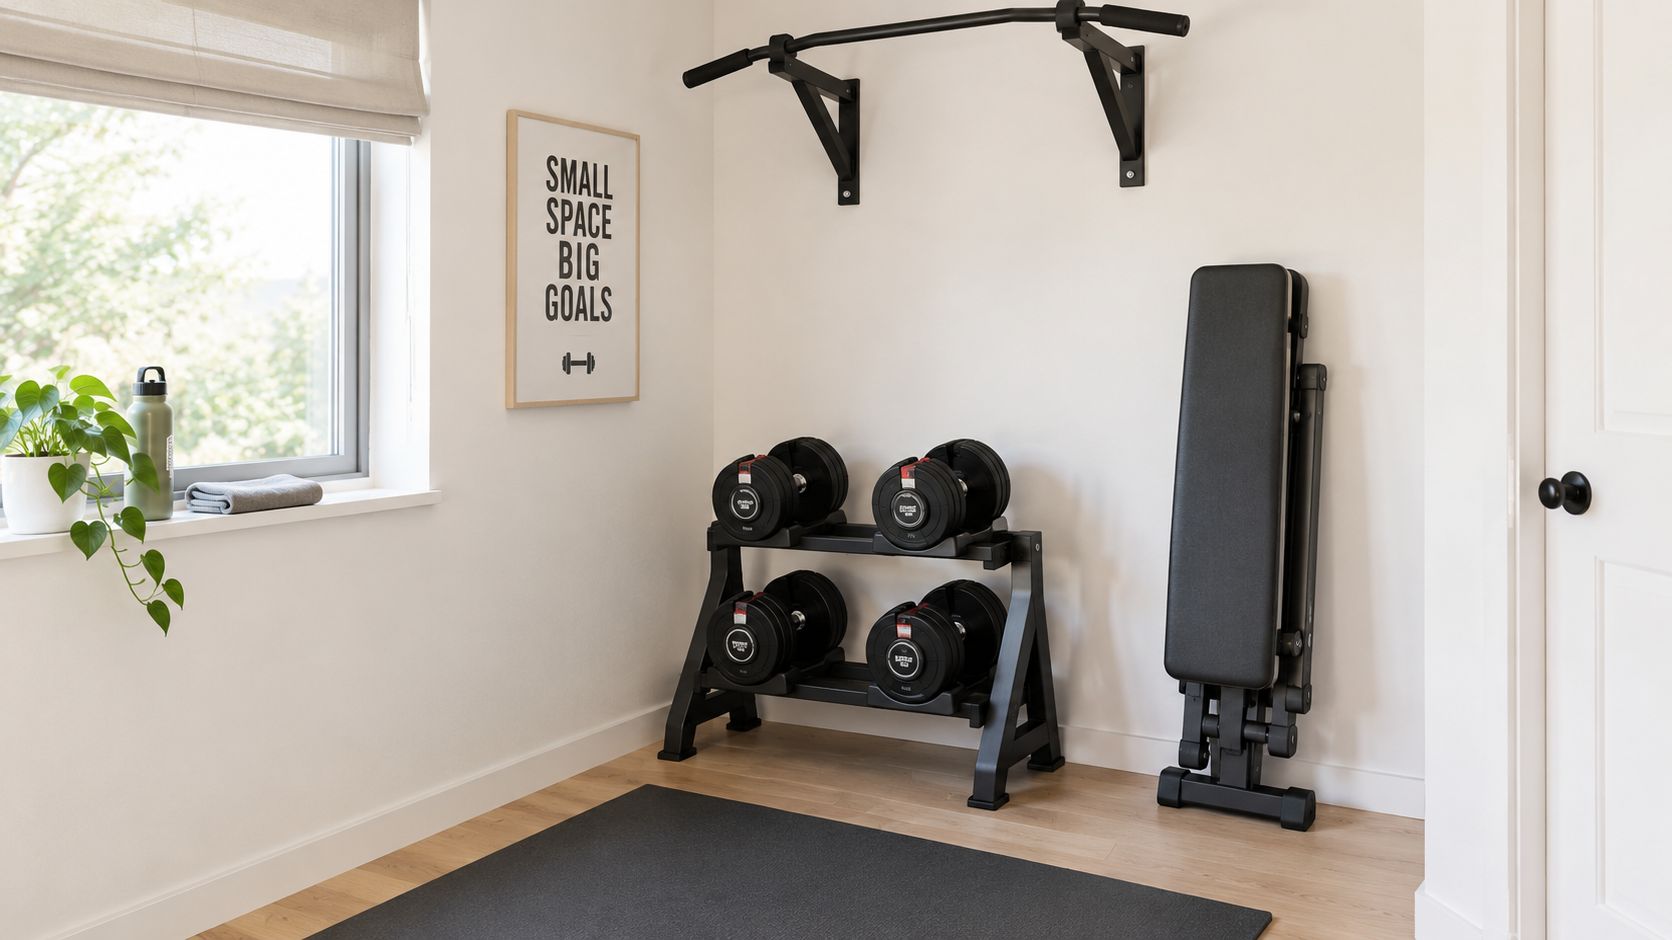
A corner setup for limited space
For about 2 × 2 m (6 × 6 ft), five pieces cover nearly everything: adjustable dumbbells, a foldable bench, a doorway pull-up bar, bands, and a mat. That list handles pressing, rows, squats, hinges, pull-ups, and mobility work.
The trade-off is loading. You will outgrow dumbbell-only resistance on lower-body lifts well before you outgrow it on presses and rows, and nothing in this setup stays assembled between sessions. Fold the bench, stack the dumbbells, and the room goes back to normal.
If your goal is general strength and consistent training, I would tell you to start here. If heavy barbell work is the point, skip to the third setup.
A spare-room setup for broader training
A spare room mostly buys you convenience. The equipment list stays close to the corner version, but the bench stays out, rubber can go down in the working area, and a wall-mounted pull-up bar joins the list if the wall can take the load. Sessions start faster because nothing needs setting up, and that matters more than any single extra piece of gear. Setup friction is what kills home training.
Hold off on a rack here unless barbell lifts are already in your program. A rack commits the room permanently, and it only pays for its footprint if you squat and press heavy often enough to justify it.
A garage or basement for barbell work
A garage or basement is where a rack, barbell, and plates start earning their space. You get real loading on the big lifts and room to move a bar overhead, provided the ceiling clears it and the floor can handle dropped weight. Shared garages, low ceilings, and floors that can't take impact all push this setup off the table, so confirm the space is yours to dedicate before you order anything large.
Whichever lane you land in, treat it as version one. Build a training plan around the gear you already own and let your sessions expose the gaps. Buy the next piece only when a lift you need has no good substitute in what you own.
Flooring, Ceiling Height, and the Power Rack Question
Flooring and ceiling clearance aren't glamorous, but they decide whether a home gym is practical. Choose rubber flooring for the impact your training creates, and measure the room before you order a rack. Guessing on either point can leave you with equipment that doesn't suit the space or the way you train.
Match rubber thickness to impact
A flooring guide lists 11–20 mm (about 7/16–13/16 in) rubber for many setups with light dumbbells and bodyweight exercise. It also describes thicker, denser flooring for areas used for heavy deadlifts, powerlifting, or Olympic lifts (rubber flooring guidance).
For a home gym with a rack and free weights, around 15 mm (about 5/8 in) recycled rubber is a practical minimum. Where weights may be dropped, plan for 20 mm or more. Those figures are about protecting the subfloor and managing impact, not making the room look like a commercial gym.
If your gym is in a basement, consider how the surface will sit over the existing floor. This overview of best flooring for cement basement can help you think through the base surface and flooring choice.
Treat the rack as a later upgrade
A power rack is a useful addition when barbell training is central to your plan, but it isn't a beginner requirement. Plan for a ceiling height of about 2.3 m (7.5 ft) so there's room for the rack, overhead movement, and safe setup. Then check the exact assembled height against the manufacturer's specifications, because rack dimensions vary.
When space or ceiling height is limited, choose adjustable dumbbells, an adjustable bench, a pull-up bar, and bands first. They give you a broad selection of movements without the same installation and clearance demands.
Turning Your List Into a Plan With GrabGains
A rack, a bench, and a set of dumbbells sitting in your garage is hardware, not a program. The gap between owning equipment and knowing what to do with it is where home gym plans stall, and no single purchase closes that gap. Your training plan has to match what you own, so a session never calls for a barbell you don't have.
My recommendation: build your GrabGains plan around the equipment you own before you buy anything else. When you swap an exercise, the app suggests alternatives that fit your setup, so a dumbbell-only list produces dumbbell sessions rather than awkward barbell substitutions. Start compact, train consistently, and let your workout history point at the next purchase.
Keep the workout and equipment in sync
For intervals and accessory circuits, a circuit training timer gives each session a clear structure without adding another piece of physical equipment. For strength work, log your sets, reps, and loads so progression is something you can see instead of guess at.
Then watch the friction.
Which exercises can't you perform at all? What takes too long to set up between sets? What do you reach for in nearly every session? Those answers are your real shopping list, and they're more reliable than any generic equipment ranking.
The useful upgrade is the one that removes a real obstacle. Buy the rack when your training calls for barbell lifts, your room can accommodate it, and your flooring is ready. Until then, it's a decoration.
A Simple Week One Buying and Training Plan
Week one has two jobs: get a first session done and expose the gaps in your setup. Skip the full purchase. Buy enough to train, then let the workouts show you what comes next.
Follow this buying and training sequence
- Day one: Measure the training area, note ceiling height, and pick your primary goal. Decide where equipment lives between sessions.
- Day two: Order the starter five in sequence: adjustable dumbbells, adjustable bench, pull-up bar, resistance bands, and rubber flooring. Tight budget? Buy the bands first and plan for the rest.
- Day three: Run a first full-body session and log it. As noted earlier, a plan shaped around the gear you own keeps exercise choices tied to your setup, so write down anything the session called for that you couldn't do.
- Day four: Bands only. A lighter accessory or mobility session simple enough to repeat.
- Days five to seven: Rest, run a second strength session, and record what slowed you down: setup time, storage, missing resistance, or a movement you couldn't perform.
If those first sessions raise questions about exercise order, loading, or progression, the AI coaching feature in GrabGains adapts its guidance to your answers. Treat early friction as information and let it direct the next purchase. Dumbbells and a bench covering your sessions? Keep training. Committed to heavy barbell work with the ceiling clearance to match? The rack earns its place next.
Your floor space and your goal pick the first pieces. Your workouts pick everything after that. GrabGains matches its programming to whatever equipment sits in your room and suggests exercise swaps that fit it, so visit GrabGains and turn your list into a routine you can follow.
Get inspired and motivated